An effective method for shaping the work
by Brinella Craft and Lab
There is an artfully created process for shaping our garments to perfection.
It is about the method called ACCORCIATED IRONS that is indispensable for creating “spaces” where there are none.
It is used, for example, to create richness in the front of a woman’s sweater to leave room for the breast or to raise the neck at the back.
They become essential in children’s clothing to work a soft garment on unconventional shapes.
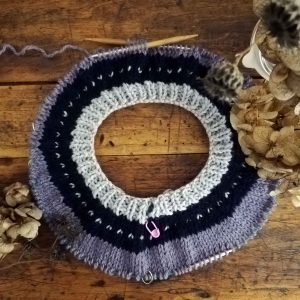 The purpose in using shortened needles, is to differentiate the size or length of certain sections of work to achieve “richness” or “overhang” where there is none.
It may be necessary, for example, to have to lengthen an edge worked in cable knit versus a body worked in plain knit to balance the difference in tension that is generated by juxtaposing different stitches.
Good practice to use in all fitted garments where fit is critical in creating a garment that looks good when worn, or in cases of tailored clothing.
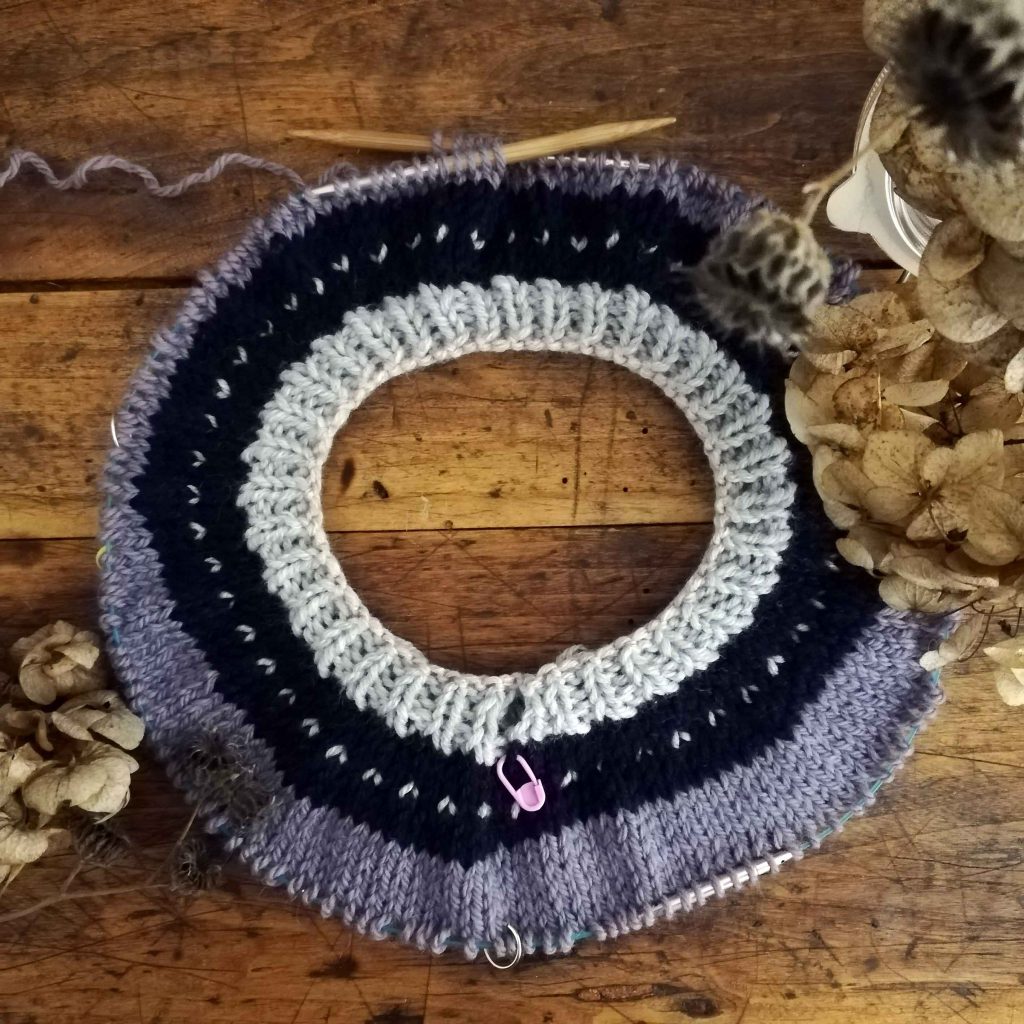
In sweaters for example, it is often used to give that extra fit at the back neck or to create breast space at the front.
Also essential in the creation of Amigurumi made in needlework, to create all the volume needed to model the three-dimensional work.
We can schematize the effects of shortened irons as follows:
- Properly distributed long shortened irons achieve elongation.
- Shortened irons concentrated at one point, creating a protrusion.
How do you work the shortened needles?
This involves working a portion of the stitches back and forth and then continuing with the basic knitting.
There are several ways to work shortened irons, and all are intended to avoid holes or ugliness within the work.
A well-executed shortened iron should not stand out from the rest of the basic work.
However, they can also be used to create a pattern or false seam in the part of the work that we have decided to vary.
Let’s look at the two simplest ways of working shortened irons:
- wrap and turn – wrap and turn;
- Japanese short rows – Japanese shortened iron.
Wrap and turn
Wrap and turn
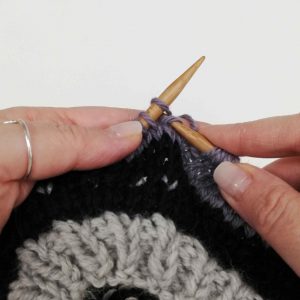
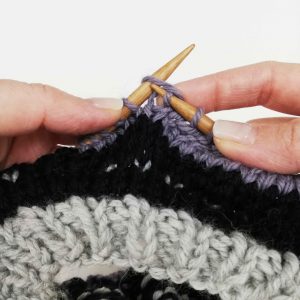
Arrived at the point where to make the shortened needles (straight), pass a knit without working it, turn the work, wrap the yarn around the knit, and move it again without working it to the right iron.
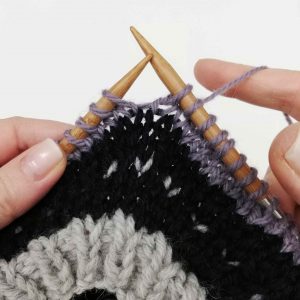
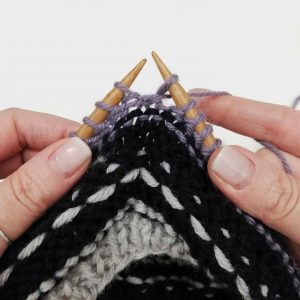
You continue working the iron backwards to the point where you end the shortened iron.
As before, you move the knit without working it to the right iron, turn the work over, pass the yarn over the back of the passed knit, move the knit to the right iron without working it, and continue working straight.
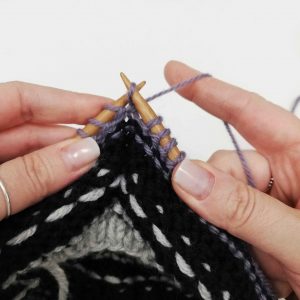
Finish the shortened iron: having arrived at the first stitch wrapped right side up, work it right side up by taking the winding yarn and the knit together (you make a kind of decrease).
In the same way proceed on the reverse side of the work but working the shortened iron close stitch and the wrapping, twisted reverse.
Japanese short rows
Japanese shortened iron
Arrived at the point where to make the shortened needles (on the right side), turn (on the wrong side) and pass the next knit on the wrong side from the left iron to the right iron.
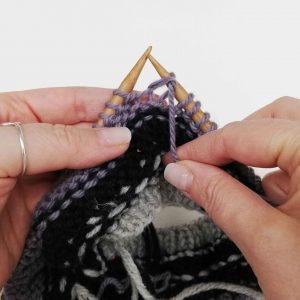
Apply a marker to the working thread.
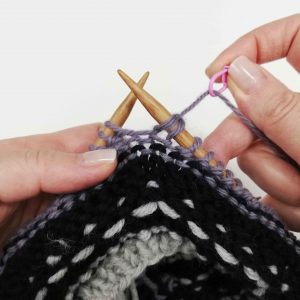
Continue working backwards, ignoring the marker, to the turning point and turn (on the straight side).
Pass the next stitch by taking it inside out, from left iron to right iron.
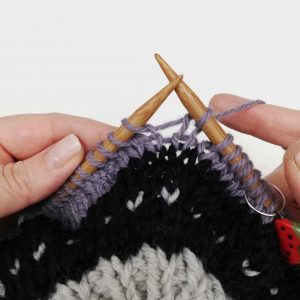
Apply a marker to the working thread.
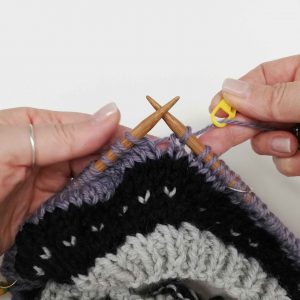
Continue working straight ahead to the marker previously inserted between the two stitches.
Close the shortened iron on the straight.
Pull the marker and load the thread onto the left iron as if it were a stitch.
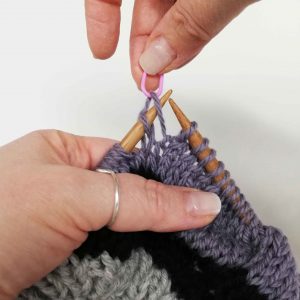
Work this new stitch together with the next stitch on the left iron as if to make a decrease and remove the marker.
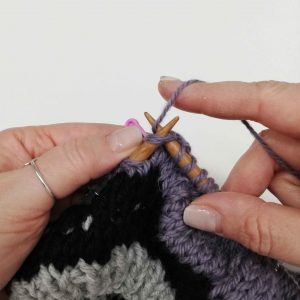
Close the shortened iron on the reverse side.
Continue working straight ahead to the marker previously inserted between the two stitches.
Pull the marker and load the yarn onto the left iron as if it were a stitch.
(See previous photo but run on the reverse side).
Work this new stitch backwards along with the next stitch on the left iron as if to make a decrease and remove the marker.
HELPFUL TIP
Also try the shortened iron on the sample of the garment you are about to work, it allows you to understand the dynamics and will make it easier for you to know where and how to place them.
